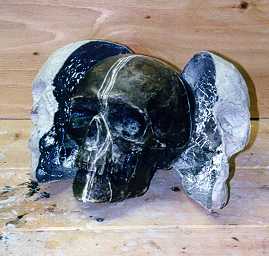
5 of the paper mache skulls I worked on this year. Each was made from an original
skull that was covered with aluminum foil, and then covered with thin strips of
newspaper dipped in a glue sizing. 2 parts glue:2 parts water, 1 part flour.
covering it to form. After dry, cut in half and remove skull. Tape skull back together,
and seal seam with more paper mache strips. This is where you then customize the skulls to fit your needs. Create a paper mash mixed with glue to then make the features on your skulls. The top left skull when finished was my witch skull. The lifelike skull in the center was my vampiress. The skull on the top right has horns and was the head to my demon. Bottom left is my wizards head. The skull front right is what I used form my mummy skull. For more detalied instructions visit Spooky House Productions. |